|
|
Post by Daniel C on Dec 3, 2010 13:21:27 GMT -5
;D While waiting for the paint to dry on my Panther and Cutlass and after talking with Tony about the 100 year navy display..... I decided to start something from the early years of naval aviation. This is the old Monogram kit of the F11C-2 Goshawk biplane. This aircraft will be in the colors of a fighter from the USS Saratoga in 1933. The box "art".  Ah, now I like these type of instructions.... That have words and tell you the part names and in this case even give construction tips. I learned a lot from the instructions when I was young.  As you can see, the decals are very old, I hope they can be used, I will have to trim them very close to keep the yellowing off of the aircraft.  Ejector pin marks.... did I say there were a few ejector pin marks on this kit?     It's going to be fun to build and rig! Hey Mr. Slowbuild, do you have any rigging plans for this airplane? |
|
|
|
Post by Daniel C on Dec 6, 2010 1:34:36 GMT -5
I did some google searches on this aircraft and found some help in the rigging of it.... There is not a lot of info an a plane that had less than fifty in US service. I found a few pictures and some poor diagrams to show what I need to do to prepare for rigging. Here are the holes drilled into the fuselage.  and the wings... The upper wings were only drilled part way through, the "wires" will be superglued into the holes.  the lower wings were drilled all the way thru, after the wings are mounted the wires from the upper will be run through these holes, superglue put in the holes and when dry the nylon line will be cut off flush on the bottom of the wing, the hole filled and sanded smooth..... very carefully  The nylon I used and the marker that will paint it.  The next puzzle to solve was how to mount the control cables to the rudder and elevator on the tail. there were no molded on control horns, so applying the Carlos KGR (aka, missing in action) method, I made a plan to scratch build them.... First, I tested my plan on the sprue to see if it would work. I drilled a hole through the flat spot (to simulate the rudder) and ran a piece of hard copper wire through the hole, used superglue to secure it...   When it dried using the sprue cutters, I cut it to the length I wanted and then using the flat, smooth pliers I clamped down hard to flatten the wire into a "control horn" It worked well enough that next is to do it to the model...  Here is the tail with the control horns being added....  Tomorrow it goes into the paint shop, a very colorful bird will come out of the paint shop! |
|
|
|
Post by Gabriel on Dec 6, 2010 2:58:27 GMT -5
Hey Dan Really nice work on the plane...  ... I like all the detail and explanation of the way you are doing all the work. thanks for sharing... ;D |
|
|
|
Post by Daniel C on Dec 8, 2010 2:12:21 GMT -5
Well, the painting has started......    ..... Tamiya tape has lifted a little of the grey primer coat.  But the colors went on ok.... The instructions say to paint the fuselage grey except for the fabric areas on them, they are to be painted aluminum. Thats a new one on me, I kind of think it is wrong and that the whole fuselage should be grey, but I liked idea of more color and doing something a little different, so it is aluminum. The white for the cowling is a pain in the butt..... anyone know how to make spraying white paint go easy? anyway, here is progress, the control wires for the rudder and elevators have been superglued inside the fuselage and the fuselage glued together for seam filling and repainting the grey paint coat.   While searching for images, I found this paper model of a Cuban F11C-2 (aka hawk II)  Might even get this finished for WinterFest! |
|
|
|
Post by mexmarine on Dec 9, 2010 0:55:39 GMT -5
Nice work Dan, this kind of models show the real skill!
|
|
|
|
Post by Daniel C on Dec 13, 2010 18:06:00 GMT -5
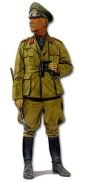
Showing my skill.... thats what I am afraid of! ;D Here it is, decals are done, they went on surprisingly well, considering they were over 35years old! They were starting to yellow, so each decal was trimmed very close or cut apart. I was also worried the setting solution wouldn't work, but it did have a little effect. The white is not as bright as it was when new, but is ok. It is now the plane of Lt. Thomas Combs, section 2 leader aboard the USS Saratoga in July of 1933.      the rigging is done, just some trimming of the wires and touch up painting to do.... oh, and paint and install Lt Combs. It should be done for Winterfest 2010.
|
|
|
|
Post by carlos on Dec 15, 2010 13:17:42 GMT -5
Nice plane! I like the coloring is eye catching.
|
|
|
|
Post by Gabriel on Dec 26, 2010 15:48:09 GMT -5
Great job Dan! You did and excellent job on the little plane, add a base to give more life.... keep on the good job. |
|
|
|
Post by Daniel C on Dec 30, 2010 18:43:28 GMT -5
No base..... just added to the case. The final portrait:    |
|
|
|
Post by mexmarine on Dec 31, 2010 14:39:31 GMT -5
Hey...your cables could be more tight ;D (LOL) hear that before? Seems like this one is ready for the Navy expo  |
|


 ... I like all the detail and explanation of the way you are doing all the work.

 ..... Tamiya tape has lifted a little of the grey primer coat.

